

Monday, February 6, 2012
Chopped Salad
Wednesday, February 1, 2012
Resolutions Of A Cook
 I ran across this picture of Gram in her first kitchen, and it put such a smile on my face. I wonder what she was cooking. She's got a little smirk on her face. I wonder what she was thinking about as she lifted the lid off that pot.
But mostly, I wonder how she learned to cook and when. My guess is that she started cooking well before her first kitchen.
While the majority of stories I hear are about people learning to cook by watching someone else, this is not my story. I've learned through trial and error, and I am still very much in the beginning stages of my self-directed culinary education. Let's not forget that I'm the girl who greased the bottom of the pan, the girl extremely intimidated to cook (or handle) any kind of meat, and the girl who, given her first kitchen in college, went absolutely crazy person at the grocery store collecting all kinds of ingredients I had no plan for. Rookie, I tell you. Total rookie. Sigh. But passionate, right?
I've been thinking over the last few days about where I want to head as cook, so this post is somewhat a list of cooking resolutions.
Tell me, what are your cooking resolutions? What do you hope to accomplish in the kitchen this year?
Resolutions of a Cook
I promise to...
1. Read the recipe from start to finish before starting to cook
2. Pull out all the ingredients called for before starting to cook
3. Cut, chop, and prep all ingredients before starting to cook (Is it just me, or do you see a theme here?)
4. Enjoy the process - stop rushing.
5. Clean up as I go.
6. Evaluate what worked and what didn't work.
7. Laugh at the mistakes (e.g. - Bread dough falling on to the kitchen floor right before going in to the oven. Yeh...it's happened. Wasn't really that funny at the time.)
8. Enjoy every bite.
9. Appreciate baby steps.
10. Keep learning!
10. Keep learning!
Tuesday, January 31, 2012
Clean Crustless Pumpkin Pie

I admit it. I'm on a pie kick. God help me.
Why do we reserve pumpkin pie for the holidays? It’s such a great dish for any time of year, and it is so simple to make. Healthy, too, if made with real and clean ingredients.
Pumpkins are a powerhouse of healthy benefits. They are great for your immune system and for your eyes. Not convinced? Here’s a whole list of benefits pumpkins bring to the table.
I love making crustless pumpkin pie on weeknights because it is extremely easy to whip up with ingredients already in the fridge, and there is little measuring and absolutely no cutting or chopping involved. It’s as simple as mix, pour, bake, and eat! You just need to make sure you pick up a couple cans of pumpkin at the store if it’s not a staple in your pantry.
Place the pie dish in the oven while you eat your main meal, and you’ll have a warm, cozy, and healthy dessert ready in only a short time.
Enjoy!
Clean Crustless Pumpkin Pie
Adapted from The Gracious Pantry
Ingredients
2 cups organic, canned pumpkin
1/2 cup honey
4 organic egg whites
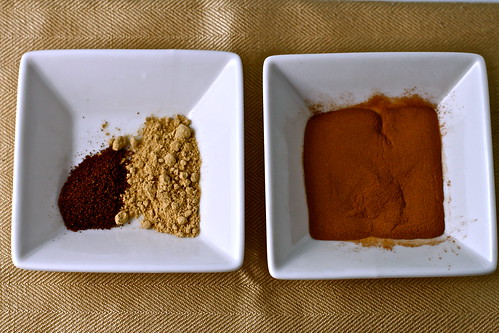
1 1/2 teaspoon cinnamon
1/2 teaspoon ground ginger
1/4 teaspoon ground cloves
1 1/2 cups organic whole milk
2 cups organic, canned pumpkin
1/2 cup honey
4 organic egg whites
1 1/2 teaspoon cinnamon
1/2 teaspoon ground ginger
1/4 teaspoon ground cloves
1 1/2 cups organic whole milk
Directions
Preheat the oven to 425 degrees.
Combine all ingredients in a large mixing bowl, and mix thoroughly.
Combine all ingredients in a large mixing bowl, and mix thoroughly.
Pour mixture into lightly greased pie plate.
Bake for 15 minutes.
Reduce oven temperature to 350 degrees and bake for 45-50 additional minutes.
Let pie rest for at least 10-15 minutes before serving.
Subscribe to:
Posts (Atom)